Add an app or dev server to Moonpool
Each app in Moonpool is one entry with a launch command, a working folder, and an optional environment. Moonpool runs the command in its own managed terminal.
Add an app
Section titled “Add an app”- Open the … menu at the top of the sidebar and choose Add app.
- Enter a name and pick a group.
- Pick the type:
web(server on a port),desktop(native app),static(a page) orcli(a command). - Set the command and the cwd it runs in.
- Fill in what the type needs: port and url for web, processName for desktop,
url for static. A
staticapp with only aurlneeds no command or cwd. - Save. The app appears in the sidebar. Use its Launch control to start it.
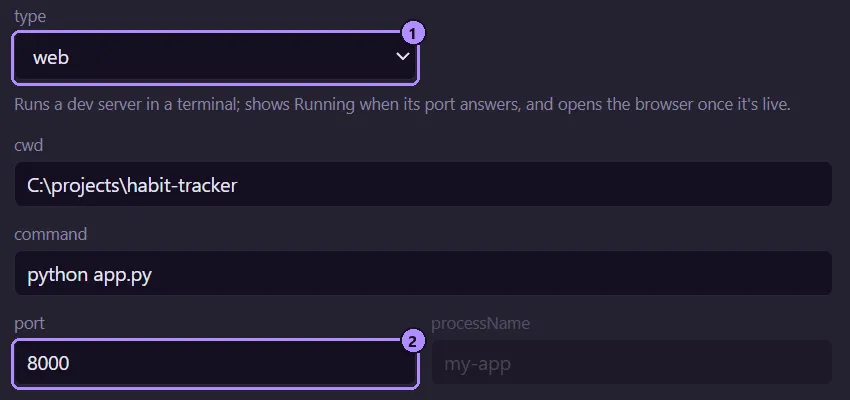
- The type select; its hint says how that type runs.
- The port field, used by
webapps.
The result is one entry in apps.json, for example:
{ "id": "my-api", "name": "My API", "group": "Dev", "type": "web", "command": "npm run dev", "cwd": "C:\\code\\my-api", "port": 3000, "url": "http://localhost:3000"}Clicking an app’s name only opens its terminal tab; see App states.
The app editor
Section titled “The app editor”- Group. Pick a group from the list, or choose + New group… and type a name.
back to list returns to the list. A blank group is saved as
Apps. - Dimmed fields are not used by the selected type. They are still saved.
- Save without a name shows
name is required. - Esc or closing the editor with unsaved changes asks “Discard your changes?”.
- To change an app later, use the pencil on its row, or right-click it and choose Edit.
Edit by hand
Section titled “Edit by hand”Choose Edit apps.json in the same menu, save the file, then choose Reload. The format, validation rules and recovery options are in the Configuration overview.
Where to go next
Section titled “Where to go next”- App fields: every key and what it does.
- App types: how each type launches and shows Running.
- Stop and restart: what to set when Stop leaves something running, and why Docker apps need care.
- Paths and environment:
{MP_HOME},./paths andenv. - Examples: complete entries to copy.
- How-to guides: dev servers in the background, Python scripts, ports.
- Portable mode
- Updating
Moonpool is free software from FasterDB